Drop Targets
Tutorial Overview:
- Import and configure a spritesheet.
- Create drop target, stacking and non-stacking draggable UI slices.
- Create an interactive UI canvas with draggables.
Create a Drop Target UI Slice
Drop targets are the inventory slots or spaces, each drop target can hold a single draggable or a stack of draggables. If we want to make a bag that has twelve spaces available to store items, the bag should have twelve drop targets. The UI slice that we will create now will be for a single inventory space.
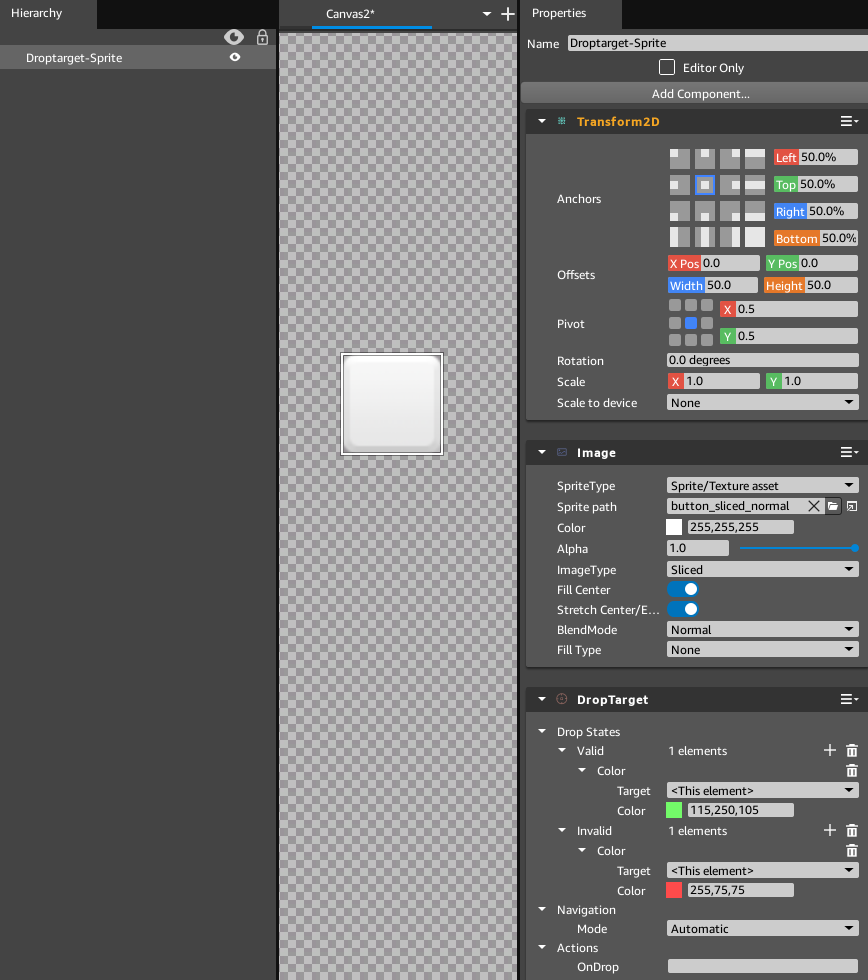
Delete everything from the Hierarchy panel and right-click to add a new Image element from the slice library, rename it Droptarget-Sprite.
In the Transform2D component, set the Width and Height Offsets to 50.
Add an Image component, using a normal sliced button or a color, set to (255,255,255) white.
Add a DropTarget component, add a Color parameter to the Valid and Invalid States. The Valid Drop state uses (115,250,105) light-green, and the Invalid Drop state uses (255,75,75) light-red.

Step 4. The DropTarget-Sprite Element Configuration
Add a Lua Script component, selecting the 'drop-target-stacking.lua' file that you saved to your project directory.
Right-Click on Droptarget-Sprite in the Hierarchy panel and select Make Detached Slice from Selected Entities.... Name the slice 'Droptarget-Sprite.slice' and save it to your project directory.
Create an Inventory Container UI Slice
Now we'll make a standard container that we can reuse throughout the UI that holds DropTargets. We'll configure this container to use as a Hotbar to place items on, as well as for bags that have room to hold additional items.
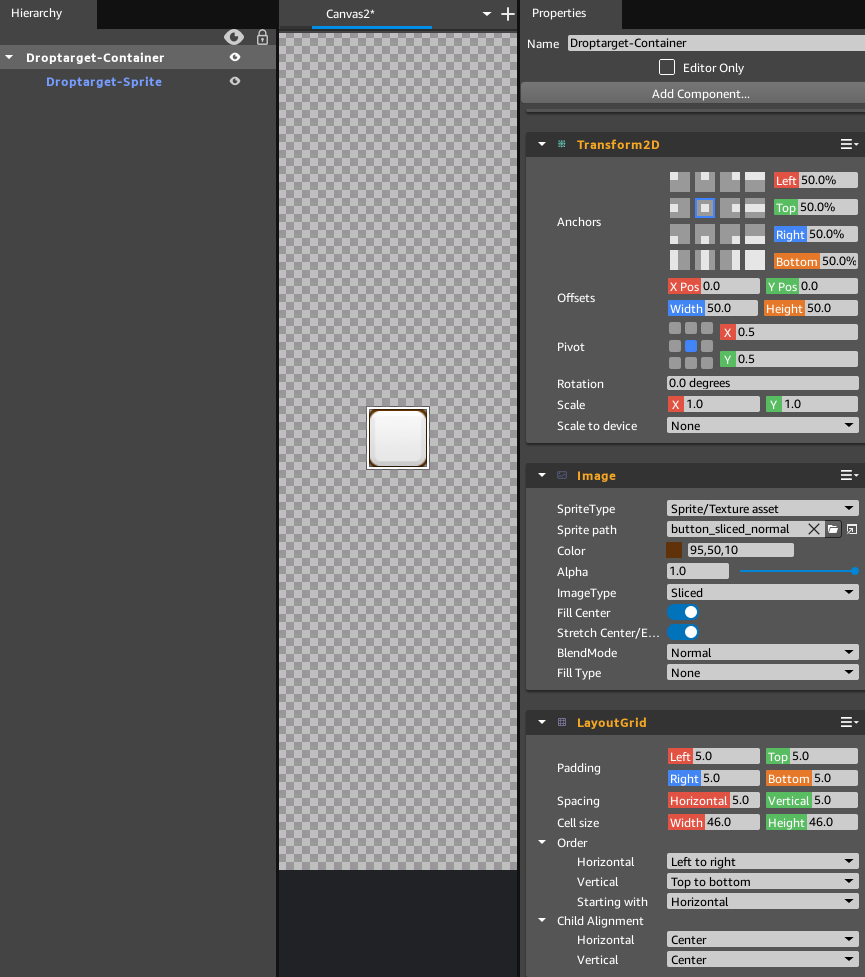
Delete everything from the Hierarchy panel and right-click to add a new Image element from the slice library, rename it Droptarget-Container.
As before, set the Sprite path of the Image component to a sliced button or a color fill. (95,50,10) leather-brown is used for the color, but any color with some contrast with white will be visible.
Add a LayoutGrid component, set all Padding and Spacing Values to 5. Set Cell Size to be 46 for both Width and Height. Set Child Alignment to be Center for both Horizontal and Vertical.
In the Hierarchy panel, right-click Droptarget-Container and select New..., Element from Slice Browser.., and choose the Droptarget-Sprite slice. The slice should be added as a child of Droptarget-Container. Only one drop target is needed now, when you use the container slice in a canvas, the drop-target can be renamed before a copy is made for each inventory slot.

Step 10. The DropTarget-Container Element Configuration
- With both Droptarget-Container and Droptarget-Sprite selected in the Hierarchy panel, right-click on Droptarget-Container and select Make Detached Slice from Selected Entities.... Name the slice 'Droptarget-Container.slice' and save it to your project directory.